The Cozy Weekend Project: Classic Baked Ziti
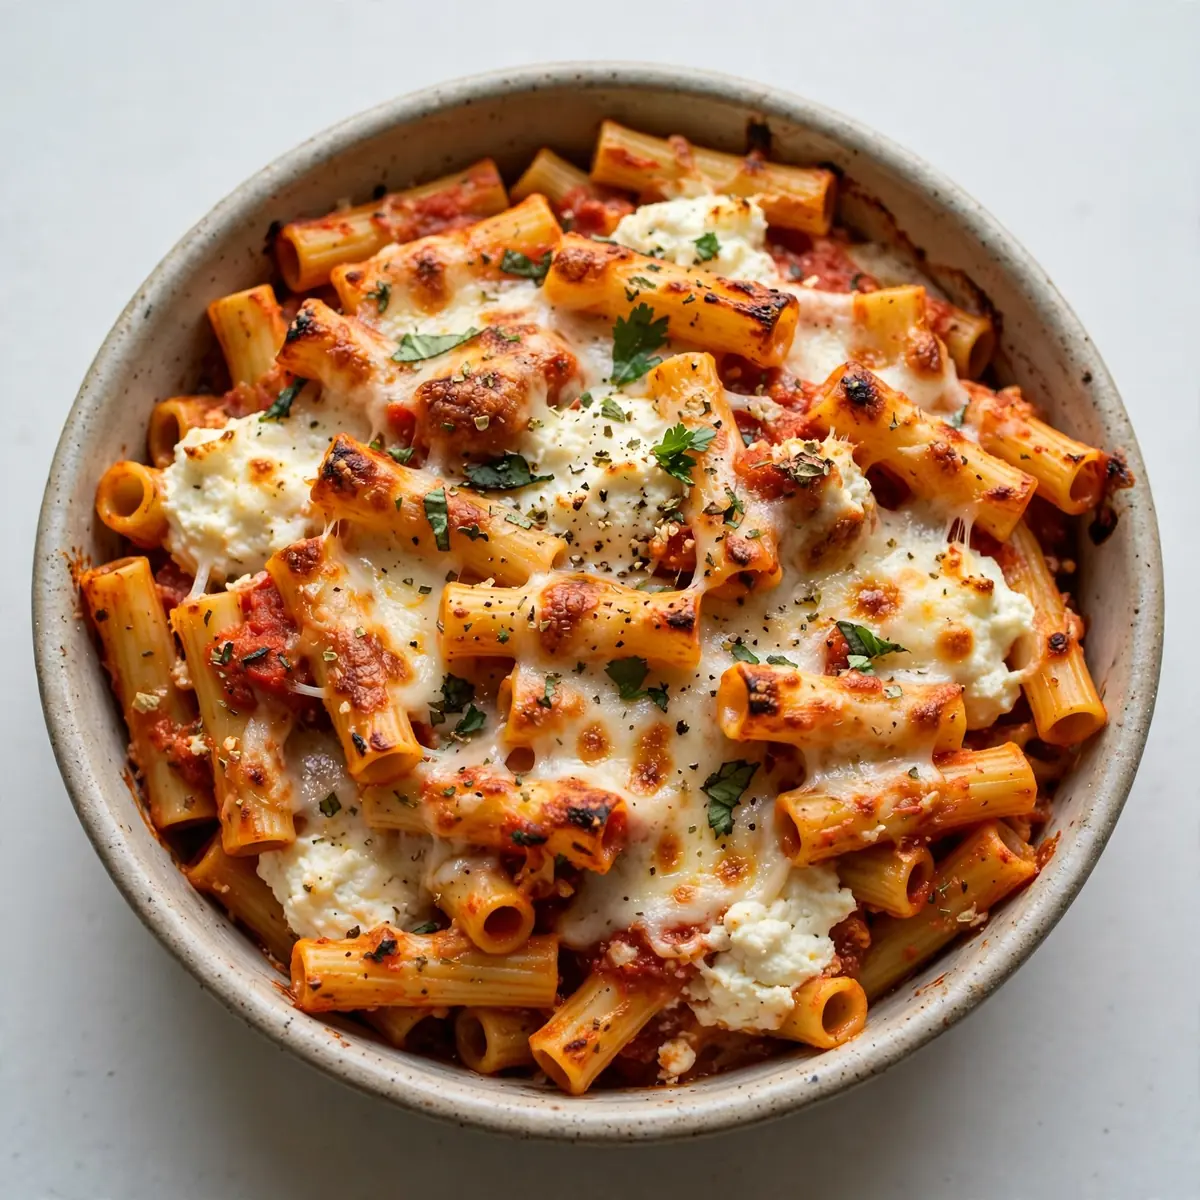
There’s something deeply satisfying about spending a slow Saturday afternoon layering a baked ziti, watching the cheese turn golden and listening to the sauce bubble away. I’ve been making this for over 7 years, and it never disappoints — it’s the sort of meal that fills your kitchen with the scent of garlic and oregano, coaxing everyone into the warmest of moods. Let’s build this together, one comforting layer at a time.
Recipe Overview
- Prep Time: 25 minutes
- Cook Time: 35–40 minutes
- Total Time: 1 hour 5 minutes
- Servings: 6–8
- Difficulty: Medium
Why You’ll Love This Classic Baked Ziti with Ricotta and Mozzarella
- Deeply satisfying to make: The process of stirring, layering, and baking feels like a proper weekend project — the kind that slows your breathing and sharpens your appetite.
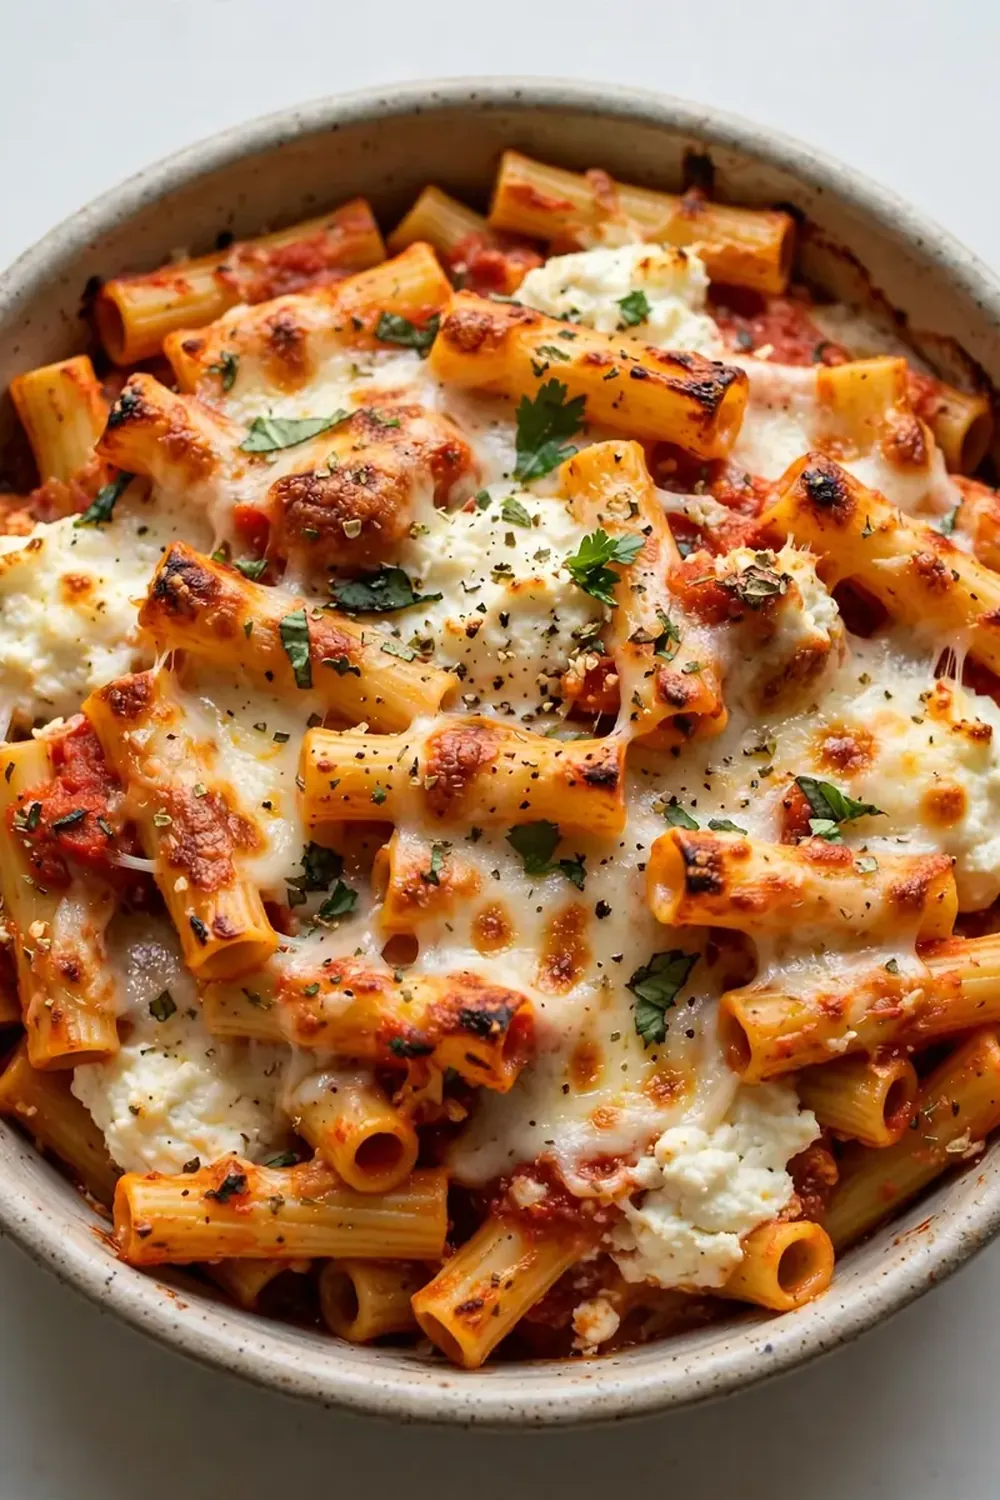
- Rich, creamy texture: The ricotta creates pockets of softness, while the mozzarella pulls into glossy, bronzed strands that are pure joy to fork through.
- Wonderfully aromatic kitchen: As it bakes, the smell of tomato, garlic, and melting cheese drifts through the house, promising something truly special.
- Perfect for sharing: This dish is generous enough to feed a small gathering, and it tastes even better when you know everyone’s about to dig in together.
- Leftovers only improve: The flavours meld overnight, so next day’s lunch is just as good — if not better — than the first serving.
Ingredients You’ll Need
- 500g dried ziti pasta (or another short, tubular pasta like penne or rigatoni)
- 2 tablespoons olive oil
- 1 large onion, finely chopped
- 4 garlic cloves, minced
- 800g tinned chopped tomatoes (good quality)
- 400g tomato passata
- 1 teaspoon dried oregano
- ½ teaspoon dried basil
- 1 teaspoon salt, plus extra for pasta water
- ½ teaspoon black pepper
- 500g full-fat ricotta cheese
- 1 large egg
- 250g fresh mozzarella, torn into small pieces
- 100g grated Parmesan or vegetarian hard cheese
- Small handful of fresh basil leaves, roughly torn (optional, for garnish)
Tip: Use full-fat ricotta for the creamiest result — the low-fat versions can turn grainy when baked, and you want that luscious, spoonable texture.
How to Make Classic Baked Ziti with Ricotta and Mozzarella
- Preheat your oven to 190°C (170°C fan) and boil the pasta. Bring a large pot of generously salted water to a rolling boil. Add the ziti and cook for 2 minutes less than the packet instructions — it should be firm to the bite, with a pale white core when you cut a piece open. The pasta will finish cooking in the sauce and oven, so resist the urge to overcook it now. Drain the pasta, reserving about 250ml of the starchy pasta water, then drizzle with a little olive oil to stop it sticking.
- Make the tomato sauce. In a large, heavy-based saucepan, warm the olive oil over a medium heat. Add the chopped onion and cook, stirring occasionally, until it turns soft and translucent — this should take around 6–8 minutes, and you’ll smell a sweet, gentle aroma. Stir in the minced garlic and cook for another minute until it becomes fragrant, but not coloured. Pour in the tinned tomatoes and passata, then add the oregano, basil, salt, and pepper. Bring the sauce to a gentle simmer — you’ll see small bubbles breaking the surface — and let it cook for 10 minutes, stirring now and then. The sauce will darken slightly and thicken, releasing a rich, herby scent.
- Prepare the ricotta mixture. While the sauce simmers, tip the ricotta into a medium mixing bowl. Add the egg and a generous pinch of salt, then stir until smooth and fully combined. The mixture should look pale and creamy, with a slight sheen from the egg.
- Combine the pasta and sauce. Pour the drained ziti into the saucepan with the tomato sauce. Add about 100ml of the reserved pasta water and stir well, making sure every tube is coated in that glossy, red sauce. You’ll see the sauce cling to the pasta, and the aroma will be deeply savoury. If the sauce seems too thick, add a splash more pasta water — it should be loose enough to coat the pasta without being watery.
- Layer the ziti in the baking dish. Spoon half of the sauced pasta into a 9×13 inch baking dish, spreading it into an even layer. Dollop half of the ricotta mixture over the top in small spoonfuls — don’t spread it; you want little pockets of creamy cheese. Scatter over half of the torn mozzarella and a third of the grated Parmesan. Repeat with the remaining pasta, then dollop the rest of the ricotta, scatter the remaining mozzarella, and finish with the final third of Parmesan.
- Bake until golden and bubbling. Place the dish on the middle rack of the oven, uncovered, and bake for 30–35 minutes. Around the 20-minute mark, you’ll hear a gentle bubbling sound and see the edges beginning to brown. By the time it’s done, the cheese on top will be a deep, patchy gold, with darker spots where the mozzarella has caramelised. The sauce will be bubbling up around the sides of the dish, and the whole kitchen will smell like a rustic Italian trattoria.
- Rest before serving. Remove the dish from the oven and let it rest on a wire rack for 10 minutes. This is crucial — the layers need time to settle, or the ziti will slide apart when you serve it. During this time, the cheese will set slightly, and the sauce will thicken further. Garnish with torn fresh basil leaves if you like, then scoop out generous portions.
Tips From My Kitchen
- Undercook your pasta deliberately. Because the ziti continues to cook in the sauce and then in the oven, you need to pull it from the water while it’s still very al dente — about 2 minutes less than the packet suggests. If you cook it fully, it will turn mushy after baking, and you’ll lose that satisfying, tender bite.
- Reserve that pasta water. The starchy water is a secret weapon for loosening the sauce without making it watery. The starch helps the sauce cling to the pasta, creating a silkier finish. Always save a mugful before draining — even if you think you won’t need it, you almost always will.
- Don’t overmix the ricotta. When stirring the ricotta with the egg, stop as soon as it looks combined. Overworking it can make the ricotta dense and heavy. You want it to remain light and fluffy, so it bakes into those lovely creamy pockets.
- Use fresh mozzarella, not pre-shredded. Pre-shredded mozzarella contains starch to stop it clumping, which means it won’t melt as smoothly. Tearing fresh mozzarella into small pieces gives you those glorious, stretchy strands when you lift a forkful. It’s worth the extra minute.
- Let the dish rest — really. I know it’s tempting to dive straight in, but those 10 minutes of resting are non-negotiable. The layers firm up, the sauce thickens, and the flavours meld together. If you serve it immediately, you’ll end up with a soupy, unstable mess.
Equipment You’ll Need
- 9×13 inch baking dish (ceramic or glass works best for even heat distribution)
- Aluminium foil (to cover if the top browns too quickly)
- Large mixing bowls (one for the ricotta, one for combining pasta and sauce)
- Sharp knife for chopping onion and garlic
- Large heavy-based saucepan for the sauce
- Colander for draining pasta
- Wooden spoon for stirring
- Measuring jug for the pasta water
Common Mistakes to Avoid
- Overcrowding the pan: If you try to cook all the pasta in a pot that’s too small, the water temperature drops and the pasta becomes sticky and clumpy. Use a large pot with plenty of water — at least 4 litres for 500g of pasta — so the ziti has room to move freely and cook evenly.
- Wrong temperature: Baking at too high a temperature will burn the cheese before the centre is hot, while too low a temperature leaves you with a pale, unappealing top. Stick to 190°C (170°C fan) — it’s the sweet spot for a golden, bubbling finish without any scorched edges.
- Skipping the rest time: I’ve made this mistake more than once. Serving the ziti straight from the oven means the layers slide apart, the cheese runs everywhere, and you lose that beautiful structured slice. Letting it rest for 10 minutes allows the moisture to redistribute and the cheese to set, giving you clean, satisfying portions.
Delicious Variations to Try
- Spicy Version: To add heat, stir 1–2 teaspoons of red pepper flakes into the tomato sauce along with the dried herbs. You can also add a finely chopped fresh chilli when you cook the onion. The warmth cuts through the richness beautifully.
- Vegetarian/Vegan Option: For a plant-based version, use a good-quality vegan ricotta (cashew-based works well) and vegan mozzarella shreds. Replace the egg with a tablespoon of ground flaxseed mixed with three tablespoons of water, left to thicken for 5 minutes. The texture will be slightly different, but still deeply comforting. For another cosy weekend vegetarian dish, try our Cozy Weekend Cheesy Mushroom And Spinach Rotini.
- Different Protein: If you want to add meat, brown 400g of minced beef or turkey in the saucepan before adding the onion. Drain any excess fat, then proceed with the recipe. The browned meat adds a savoury depth that pairs wonderfully with the creamy ricotta. For a lighter, summer-inspired meal, you might also enjoy our Easy Summer Pasta With Pesto.
What to Serve With Classic Baked Ziti with Ricotta and Mozzarella
- A crisp green salad with a sharp lemon vinaigrette — the acidity cuts through the richness of the cheese.
- Garlic bread or crusty sourdough for mopping up every last bit of sauce from the plate.
- Roasted vegetables, such as courgettes or peppers, for a colourful, earthy side. For a more elaborate side, try our Roasted Beet Salad Goat Cheese A Weekend Comfort Project.
Still hungry for ideas? You might also love 30 Min Eggplant And Zucchini Baked Ziti, Cozy Weekend Project Eggplant And Zucchini Baked Ziti from our sister kitchens.
Frequently Asked Questions
Classic Baked Ziti with Ricotta and Mozzarella
Ingredients
Method
- Preheat your oven to 190°C (170°C fan) and boil the pasta. Bring a large pot of generously salted water to a rolling boil. Add the ziti and cook for 2 minutes less than the packet instructions — it should be firm to the bite, with a pale white core when you cut a piece open. The pasta will finish cooking in the sauce and oven, so resist the urge to overcook it now. Drain the pasta, reserving about 250ml of the starchy pasta water, then drizzle with a little olive oil to stop it sticking.
- Make the tomato sauce. In a large, heavy-based saucepan, warm the olive oil over a medium heat. Add the chopped onion and cook, stirring occasionally, until it turns soft and translucent — this should take around 6–8 minutes, and you’ll smell a sweet, gentle aroma. Stir in the minced garlic and cook for another minute until it becomes fragrant, but not coloured. Pour in the tinned tomatoes and passata, then add the oregano, basil, salt, and pepper. Bring the sauce to a gentle simmer — you’ll see small bubbles breaking the surface — and let it cook for 10 minutes, stirring now and then. The sauce will darken slightly and thicken, releasing a rich, herby scent.
- Prepare the ricotta mixture. While the sauce simmers, tip the ricotta into a medium mixing bowl. Add the egg and a generous pinch of salt, then stir until smooth and fully combined. The mixture should look pale and creamy, with a slight sheen from the egg.
- Combine the pasta and sauce. Pour the drained ziti into the saucepan with the tomato sauce. Add about 100ml of the reserved pasta water and stir well, making sure every tube is coated in that glossy, red sauce. You’ll see the sauce cling to the pasta, and the aroma will be deeply savoury. If the sauce seems too thick, add a splash more pasta water — it should be loose enough to coat the pasta without being watery.
- Layer the ziti in the baking dish. Spoon half of the sauced pasta into a 9x13 inch baking dish, spreading it into an even layer. Dollop half of the ricotta mixture over the top in small spoonfuls — don’t spread it; you want little pockets of creamy cheese. Scatter over half of the torn mozzarella and a third of the grated Parmesan. Repeat with the remaining pasta, then dollop the rest of the ricotta, scatter the remaining mozzarella, and finish with the final third of Parmesan.
- Bake until golden and bubbling. Place the dish on the middle rack of the oven, uncovered, and bake for 30–35 minutes. Around the 20-minute mark, you’ll hear a gentle bubbling sound and see the edges beginning to brown. By the time it’s done, the cheese on top will be a deep, patchy gold, with darker spots where the mozzarella has caramelised. The sauce will be bubbling up around the sides of the dish, and the whole kitchen will smell like a rustic Italian trattoria.
- Rest before serving. Remove the dish from the oven and let it rest on a wire rack for 10 minutes. This is crucial — the layers need time to settle, or the ziti will slide apart when you serve it. During this time, the cheese will set slightly, and the sauce will thicken further. Garnish with torn fresh basil leaves if you like, then scoop out generous portions.
Notes
I hope this baked ziti becomes as much of a weekend staple in your kitchen as it is in mine. There’s real joy in taking your time, layering each ingredient, and watching it transform into something golden and bubbling. If you give it a go, I’d love to hear how it turned out — drop a comment below and tell me about your own cosy cooking moments.